
Here Are The Top 3 Methods to Remove a Background in Photoshop for Beginners
With the dawn of AI Tools, manipulating photos has never been easier. Gone are the days when you had to sit for hours tidying up your Photoshop compositions and manually erasing the backgrounds to save your cherished memories! Here’s how you can remove the background of any photo with the click of a button.
1. Using the New Contextual Task Bar
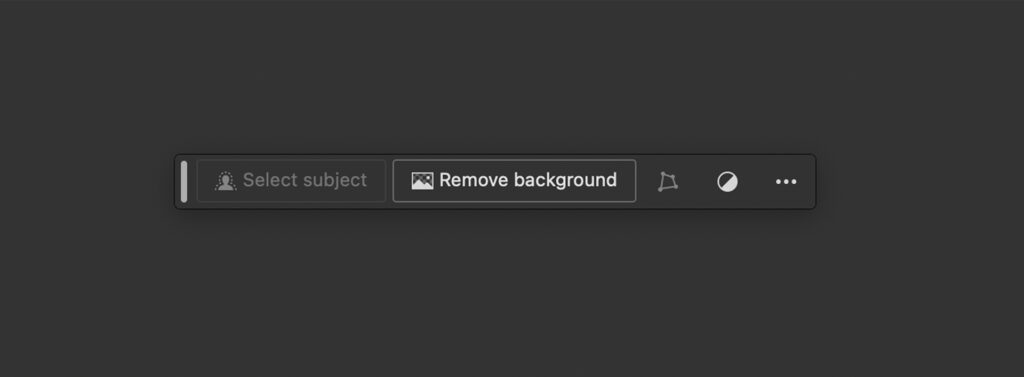
Photoshop 2024 has launched a new feature called the ‘Contextual Task Bar’ that helps you completely remove the background with the click of just one button.
Here’s How To Use It
STEP 1:
Select the Image you want to remove the background of in the Layers Panel on the bottom right of your screen. The layer will have the name of your file, generally, “IMG_” or “Layer 1”.
STEP 2:
Locate the Contextual Task Bar at the bottom of your screen and Click ‘Remove Background’. If you cannot see the Contextual Task Bar, you can make it visible by going to ‘Window’ and enabling ‘Contextual Task Bar’ at the bottom of the dropdown menu.
If all goes well, your background should be removed perfectly! But what if it does not give you the results you are looking for, or what if you don’t have access to Photoshop 2024? The next 4 Steps cover exactly how to remove the Background of a Photo, in these situations!
2. Selecting the Subject of your Photo
This method is the next easiest way to remove the background of your Image in Photoshop. Although this requires some extra steps that aren’t too complicated
Here’s How It Works
STEP 1:
Just like the previous method, Select the Image you want to remove the background of in the Layers Panel on the bottom right of your screen. The layer will have the name of your file, generally, “IMG_” or “Layer 1”.
STEP 2:
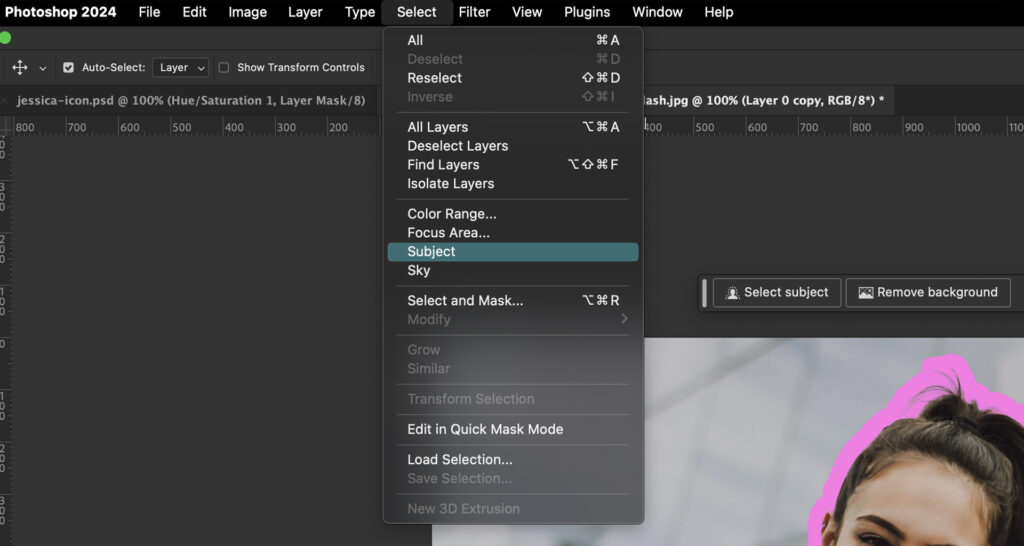
Click ‘Select’ in the Task Bar on the top of your screen. In the Dropdown Menu, look for ‘Subject’ and click it. This will create a selection around your subject which will be denoted by dotted lines (aka. marching ants) along the subject of your picture.
STEP 3:
The last step is to create a Layer Mask. This can easily be done by clicking the Layer Mask button (it should look like a Rectangle with a Circle inside it) at the bottom right of your screen, right under the Layers Panel.
Congratulations! You have removed your background from your Image. Plus you learnt the bonus skill of masking, which can be used to create complex Photoshop Compositions and Digital Art.
3. Using the Object Selection Tool

Using the Object Selection tool is great for stubborn parts of your photo that are just impossible to remove with the previous methods. This method is quite simple itself but it requires you to select your Subject manually.
Here’s How To Do It
STEP 1:
Select the Subject of your Image using the Object Selection Tool. You can find the Tool in the Tool Bar on the Left or use the shortcut key ‘W’.
Hover over your subject till you see a Pink Outline, and click on it to make a Selection. If you don’t see an outline, Click and Drag over the Object you want to make a Selection of.
STEP 2:
Now, make a Layer Mask by Clicking the Layer Mask Button at the bottom-right of your screen.
There you have it! These are the 3 easiest ways to remove the background of an Image on Photoshop in 2024. They are the most beginner friendly methods I could think of and I hope they were helpful.
Happy Photoshopping, see you soon! <3